
How to Learn Surf Photography From The Beach
The beginners guide to learning surf photography from the Beach
Learning surf photography requires practice and a drive to continually improve your own photos. Being a good surf photographer involves experimenting with your own perspective of the elements and scenery, not just copying what others do. You need to develop your perspective and consider variables like; the light, the formation of the waves, timing, motion of the surfer, and positioning of the camera. If you’re also a surfer, understanding a surfers movements and the formation of the waves may be second nature. But it you’re entirely new to the sport, understanding you’re subjects will help you to predict the right moment and capture emotions. A good way to develop ideas for your surf photography is to talk to the surfers, and try find out what about surfing makes them feel great.
The most important steps for getting into surf photography are to choose the right camera equipment, study the conditions and choose the right settings. When it comes to taking photos from the beach you want to have: a camera can take at least 5 frames per second, a telephoto lens with at least 300mm, a stable tripod. Once you have these things, you’re ready to start practice. You should learn by doing. Learn how to compose an image and make the most of a scene by practicing and understanding your camera settings. Typically, shooting surf photography from land requires lots of light to use a high shutter speed. However, when it comes to art there’s always a creative exception to the rule.
I’m writing this today, because when I first started surf photography, I was unsure of where to start. The most important thing is to start, because you can swap gear around and make changes later. I hope my research and practice can now help you too in learning surf photography. This guide goes into detail on all the things I have mentioned above, so keep reading if you want to learn more.
1. Set Up Your Gear
Finding the best gear for surf photography
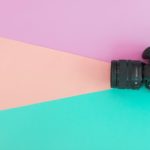
Before you get into surf photography you have to choose the right gear for the job. Often people think to take nice photos you need to have the very best gear, but they would be wrong. The perfect gear is great for professional photographers who need to take top quality photos to feature on magazines and billboards, but it what is really perfect? Its not the only gear that will get the job done, nor is it the only requirement for taking good photos. The most important ingredients for good photos are having the right settings, a creative vision and good composure.
Choosing A Camera For Surf Photography
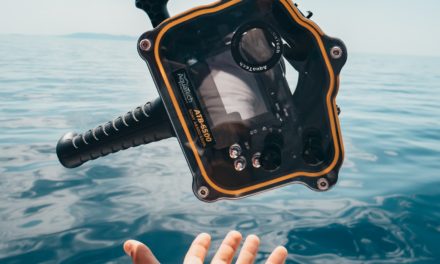
The easiest way to start surf photography is from land, as it enables you to use more versatile gear. So for those of you who don’t already have one, you will need a DSLR. Now we can’t all afford the Canon EOS-1DX Mark II (link to amazon) to shoot 16 frames per second (fps), but we don’t all need to. Personally, my camera (link to amazon) shoots 5 fps, and although it’s not really a professional level camera, I find it does the trick. But you wouldn’t want any less than that and you can pick it up new for around $400-$500 and used for even less. If you don’t already have a camera, a good way to buy more for less, is to buy used DSLRs. After about 4 years or so they tend go down a lot in price, which can make some of the older semi-pro cameras better value than the new entry level low priced cameras.
DSLR Buying Guide Specifications Surf Photography
- Minimum 5fps
- Recommended at least 16 megapixels for a tight budget (a good selection of used cameras have at least 18 megapixels)
Canon DSLR Suggestions for Surf Photography (Amazon Links)
Check out the links below to compare the best prices.
Professional
New: 1DX Mark III , 5d Mark IV
Used: 1DX Mark II , 5d Mark IV
Semi-Professional
New: 7D Mark II, 80d
Used (Best budget value): 7D Mark I, 60d, 70d
Entry-Level
New: 800d
Nikon DSLR Suggestions for Surf Photography (Amazon Links)
SONY CAMERA SUGGESTIONS FOR SURF PHOTOGRAPHY (Amazon Links)
Check out the links below to compare the best prices.
Professional
New: Sony α9, Sony a9 II
Used: Sony Alpha 99, Sony α99 II
Buy a Telephoto Lens with reach
Buying a lens on a budget
If you’re new to surf photography, or just like it as a hobby, spending thousand on lenses to take surf photography is probably a big turn off. Alas, its not always necessary. If you make the most of your gear, stabilize your images yourself, and utilize cropping and post editing software (such as Adobe Lightroom and Photoshop) you certainly make do. To get the right composure you will need a lens with a good reach. It really depends on where you are planning to take the most photos, and how far away the surfers are. While cropping is good for salvaging photos for picking up the slack, is doesn’t always make up for that lack of reach. I personally have taken most of my photos from point breaks as I can usually get a lot closer to the action. But if you want that nice tight action shot, I would still recommend having at 300mm of reach in a lens. The good thing about 300mm lens is that there are dirt cheap budget lens. With Canon and Nikon, you shouldn’t have a problem finding a 70-300mm lens for between $100-$150, the trade of is that they are of cheap build and don’t have image stabilization, but they are a good start to learn the ropes and they will help you decide whether its worth it for you to spend more on a better lens.
If you’re willing to spend a bit more on a budget lens, Sigma and Tamron have some great option with tonnes of reach which you should be able to pick up used for between $500-$1000, such as the Sigma 150-500mm f/5-6.3, Sigma 120-400mm f/4.5-5.6, and the Tamron 150-600mm f/5-6.3, Tamron SP 150-600mm F/5-6.3 (Click the links to view on Amazon).
Getting Serious about Surf Photography
If you nail your composure and settings, there’s no doubt you could still achieve professional quality photos, but if you’re really serious about surf photography and can afford it, skip the time mucking about with budget gear and invest in higher quality lenses. In the end, they are more expensive for a reason, you’ll often find they are built more robust, shooting faster and sharper photos. Buy lenses like the Tamron SP 150-600mm F/5-6.3 and maximise the enjoyment and potential of you photography, find it on Amazon by clicking here.
Buy a steady Tripod and/or Monopod
When shooting from land and you find a good vantage point, for better image stabilization use a tripod, or if you when a tad more mobility use a monopod. It is a must if your lens doesn’t have image or optical stabilization. Even your lens does have image stabilization, using a tripod could still save you from camera shake, especially if you don’t have a steady hand.
To save you and get better quality at the same time, you can even buy a tripod that turns into a monopod, which is also ultra convenient (Click here to search for Adjustable Pro Tripod Monopods on Amazon).
Things to consider when buying a lens for surf photography.
- Lenses with lens zoom generally shoot better pictures within their range, that’s why 50mm lens are so popular for portraits. For example, shooting long distance with a lens 200mm prime lens will likely take better photos than a 18-300mm lens.
- Make sure your gear can auto-focus, when shooting motion sports photography you want to capture clean, still snapshots of the subject, which means to accompany your high shutter speed photos, manual focusing just wont cut it, you need a quick auto-focusing system.
- Extenders reduce image quality and slows down the auto-focusing, so unless you have a top grade lens, its probably not worth it.
2. Study the conditions before shooting
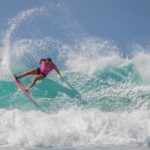
You should be trying to maximize your composure, by understanding the light and how it will affect your photos. Generally, surf photography requires a lot of light because is requires such high shutter speeds. Consider where the sun is, how the shadow will affect the surfer, and which direction the glare is coming from. Sometimes options are limited and you just have to make do, but for the best results I find you want to be shooting the surfers from an angle where their shadow is behind them and the glare is minimal. You can sometimes use a good quality polarizing filter to reduce the glare, but adding the extra glass onto the lens can reduce the sharpness of your images and might make your photos a bit darker. As you become more experienced keep trying different things to see you can manipulate the effects of the light and sunshine to improve the quality of your photos.
It really depends on the type of photos you want to take and how you want to showcase the action, so the method is very subjective, which is why its better to experiment from all the angels. If I’m shooting from the beach, I try stand on a rock or something go give me a better vantage point of the surfer, so all of the wash from the waves in front doesn’t get in my way. Just make sure you can get a nice steady shot, and if you need a tripod or monopod, find a spot where you can use it.
How to choose your settings for surf photography
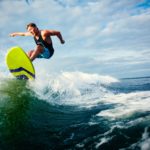
Surfing is a fast and dynamic sport, so to capture its essence, its no good if your camera takes a full second to take a photos. There will always be artsy exceptions to the rule, but often you need to capture the moment instantly as soon as it happens, with sharp detail and character. If you’re just starting out and aren’t quite comfortable with using manual or aren’t sure how to use the light yet, use the TV, as this is shutter priority, crank that shutter speed up and experiment with it until you get good brightness in your photos. If you’re really fresh to the manual world you can even set your ISO to auto which should make up for a misjudgment in settings, however keep in mind, the low the ISO the better, otherwise you start to introduce more and more noise into your photos, and if your photos get too grainy they become harder to edit well. And of course if you aren’t comfortable with any of that yet, you can always fall back on the automatic sports or actions modes on the camera.
As you gain confidence its always better to master the manual settings of your camera as they give you ultimate control over the detail that comes from choosing the correct aperture and shutter speed. The problem with automatic settings is they can’t read the moment as well as you can, often over or under exposing your photos. The most impressive surf photography photos tend to have a nice and crisp sharpness, freezing the motion, incorporating the results of the motion such as the spray or trail, with correctly exposed skin on the surfer.
Take Lots of Photos
While post editing raw DSLR images allows you to do and salvage more, often the best photos have that it factor because they were taken that way. Post editing is a great fallback, but try not to become to dependent on it. You want to be able to take good photos, not just turn things into decent photos all the time. Get out there and experiment with your composure and settings to try take photos that you don’t have to edit for them to look good. Find your it factor.
Tips to consider when selecting your camera settings
- High shutter speed.
- Low ISO (Preferably keep it between ISO 100-200, and try not to go higher than ISO 400 unless you really don’t have a lot of light to work with.
- Sharp Aperture, choose an aperture that will keep your photo sharp while leaving your photo sufficiently exposed.
- Managing over-exposure (too bright): If its too bright, first make the ISO as low as you can, if its still to bright raise the shutter speed, if you’re facing god like rays and its still too bright, lower the aperture (raise the aperture number, the high the number the less light it lets in.)
- Managing under-exposure (too dark): If you have the right shutter speed to freeze the motion of the surfer, then first try adjusting the aperture until it is at its lowest number, and all you can do is raise the ISO. Any darker and you may have to lower the shutter speed and experiment with a bit of motion blur.
- Watch where you focus. If you are shooting from land make sure you’re focusing on the surfer, because the auto-focus with try focus on everything before the surfer, which can sometimes be hard to tell until you get them back on a computer.
3. Post Editing
There’s a variety of different photo editing software out there, however Adobe have it down pat for convenience sake, because you can really do just about anything you want to do with Lightroom and Photoshop. Though, regardless of what software you are using, for quality images one of the easiest ways to make a photo look better is by cropping them.
For example
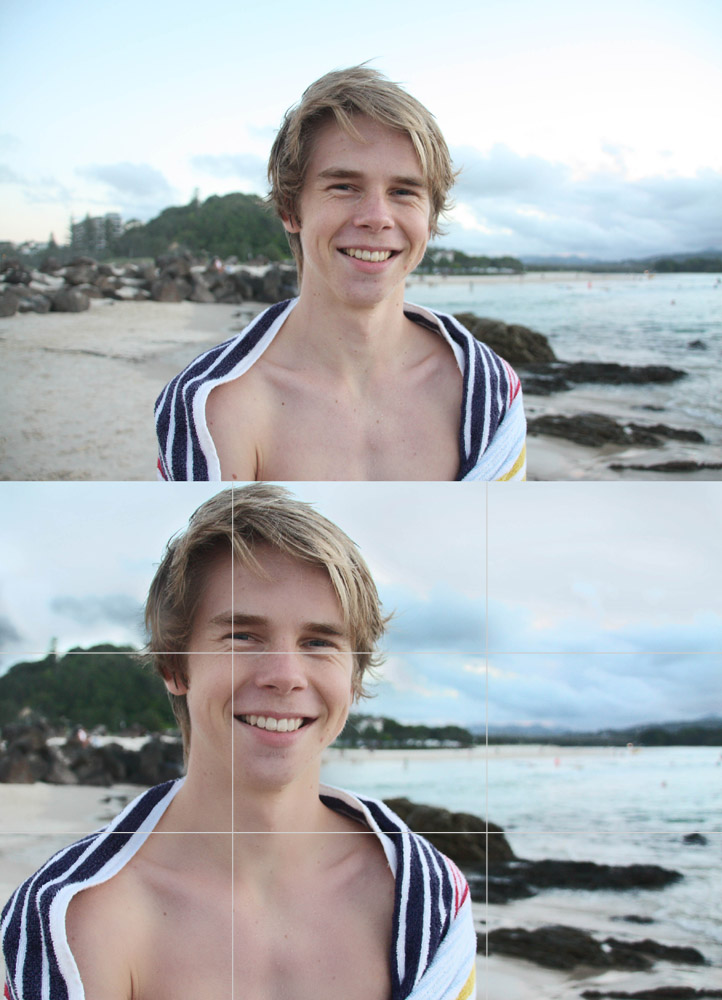
One common practice is to use the rule of thirds. While it can be easier to incorporate it when take the picture, taking high speed photos can make it hard to perfectly line up that frame which is where cropping comes in handy. However, when it comes to surfing, because there can be a lot going on with a picture with the wave and the trail the surfer, you sometimes have to be a bit lax with the rule of thirds.
Lightroom
You can’t always be in a tropical paradise, where every photo looks perfect straight of the camera. Thus, post processing is a great way to enhance the quality of you images and composure. Lightroom is a powerful, and widely use post editing tool which is great for efficiently getting to most out of your images. It enables you to adjust important elements such as the contrast, exposure, and saturation, and is pack full of features which can help you completely transform an image (if you wanted to).
Make the most of masks, filters and brushes. These are handy because they enable you to apply settings to specific areas of you photos, such as ONLY to the surfer, or ONLY to the background.
Don’t be afraid to experiment, your image may not always would out, but if you learn new techniques to help you make a superb images in the future, its worth it. This is especially useful if you don’t always have to option to shoot regularly, be experimenting with your images it can also help you understand what makes your images look good, and can enhance your photography skills by giving you better vision and improving your ability to read the scene and apply settings for the desired outcome.
Lightroom Editing Tips for Surf Photography
- High Brightness – Well exposed wave and surfer with plenty contrast)
- Enhanced Clarity
- Slightly Lowered Saturation, but raised vibrance (eg. Saturation -10, Vibrance +20)
- Slightly reduce the saturation of reds, oranges, and purples
- Slightly enhance the saturation for the blues and greens
- Find presets to suit your photos and desired finish
- Save your most common adjustments as presets to save time
Photoshop
Lightroom is photo manipulation to an extent, as at allows you to add filters and custom adjustments, etc. However, if you’re a real visionary kind of person, who wants to warp, add to, and manipulate the image into something it wasn’t, Photoshop is for you. For general photography, Photoshop is a necessity, generally Lightroom is best and most convenient for bringing out the best in a image. Although, as you get more confident and really want to alter the image and get into the area of photo-manipulation that’s when Photoshop becomes most useful for surf photography.
For example, if I was to use Photoshop to edit my surf photos, it would be to add something like a sunset and flying birds, or to maybe re-position landmarks in the background, such as making to city or mounts on the other side of the bay look much closer for more well rounded image. In essence, its a way to fake good composition and scenery.
Know your audience
Consider who your photos are for.
Are you shooting professional photos for a magazine or billboard?
When you’re shooting for such a commercial and large scale purpose, this is when you really need to take to most care with the quality of you images.
Are you shooting photos for an amateur client?
Although it would be nice to take billboard worthy photos for clients, you need to be realistic, most of the time they just want cool photos of themselves surfing. Quality is important, but you want always be in a quite setting with perfect conditions, so work with what you’ve got, capture some good moments of your subject, and remember, for it to be profitable the effort you put in, needs to be reflective of how much you are getting paid.
Are you shooting photos for your blog and Instagram?
I find this is the easiest to shoot for. Often it’s hard to tell on the camera whether or not the photo worked out as planned. It can make you a bit lazy with your settings, but when you’re shooting for such small screens, its easier to fake a better quality image because the audience can only see it at on a phone or on the blog feed of a website.
Other?
Its up to the photographer you want to be, you can mix things up to suit your style or the photos purpose.
The main issue here is integrity and honesty, and if everyone is happy it shouldn’t really matter, just don’t try to pass things off as real when they’re not. Its ok to make beautiful images, it is a form or art after all, but be transparent and respectful, don’t try cheat customers, or fake your way into things.
Knowing where your photos will be showing will also help you decide how to sort and edit them. If you are shooting professional photos to be published, you may want to focus more on the very best quality frames of a wave. However, I find if the primary place I am posting my photos is Instagram you can get away with a lot more, because the images are being shared at such a small size you can defects such as a slight blur aren’t as noticeable as they are on the big screen, allowing you to post them off as better quality shots.
Get out there and Experiment