
A Guide for Surf Photography in the water (Underwater Tips)
Getting Started with Surf Photography in the Water
As an aspiring beach photographer and a long time surf life saver, I’ve always wondered what it would take to become an underwater surf photographer. So I decided to do some research and find out.
Underwater surf photography or in water surf photography requires a compilation of fitness, confidence, and technical skills. Some quick tips are to: look after your safely safety first, get a camera wide a wide enough lens to fit your whole frame, use shutter priority set at at least 1/1000 and with your ISO set to auto.
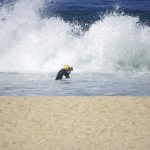
Unlike many other forms of photography, surf photography from the water is a fast faced and very physically demanding sport. Before hitting the water, it is a prerequisite that you thoroughly understand everything that’s happening around you. You need to know what is happening before it happens and have high physical endurance to brave the swell. The ocean is an unforgiving place, especially when you throw yourself amongst dozens of moving surfers. So until you feel comfortable with your ability to stay safe, you need to take it easy.
It’s ok for the surfers, they have a board keeping them afloat. As an in water surf photographer you need to keep yourself afloat and stay out of surfers way. All while braving the waves to position yourself to take a photo in mere seconds. It certainly helps if you’re a surfer and can judge a surfers actions on a wave. But also, you need to be a very strong and confident swimmer. It takes some serious fitness to manoeuvre yourself around the water safely, while lining up to take photos as surfers come racing past you. It takes some serious technical skill to then be able to get the settings right, line up the frame and then take the shots.
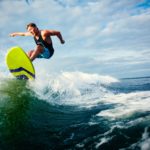
Still interested? Good. In water surf photography can be an extremely rewarding art form. There’s something about locking yourself into a wave with a surfer and being able to immortalize the moment that can be truly mesmerizing. Here are some simple tips to help you have the best surf photography.
Tip #1: Safety first
As a surf life saver, I know full well how dangerous the ocean can be. From waves, to rips and marine creatures, to people there’s always something requiring you to stay alert.
The most important rule of surf photography is it consider the safety of yourself and others around you. After practically growing up in the surf, I’ve seen some tragic injuries. If you don’t know you’re doing, it could be deadly. Don’t be too hasty, take your time to learn about the water. You need to know about all the conditions, the weather, tides, sweeps, rips, reefs, sandbanks. If you’re not a confident swimmer, start training. You want to have high physical endurance and be able to tread water with the ability to stay afloat for hours.
If you’re in busy surf, it’s almost like being on a highway in rush hour. As an in water surf photographer, you’re an obstruction on the wave. With surfers are coming at you, it can be a dangerous situation. You need to start small and become familiar with how to react and read the waves. It certainly helps, if you’re already and experienced surfer, because then you likely have a head start on learning to read and understand the conditions.
Some might say that sport photography is an extreme sport. And how many extreme sportsmen don’t wear some sort of personal protection equipment (PPE)?… You may think of yourself as a confident swimmer, but when you’re out obstructing the waves, you can’t expect that everyone else is competent or can actually see you.So it’s better safe than sorry and at least get yourself some PPE.
Recommended Safety Gear for Surf Photography
I’m not saying everyone needs all of this, but I would advise you to at least consider some. If you’re not sure what to get, let me explain:
- Crash helmet – It might sound silly wearing a helmet in water, but you have to think about the solid boards flying towards you, waves dumping into sand, rocks, reefs, and more. Just about every extreme water sport requires a crash helmet. Water sports safety helmets are relatively cheap to buy, and it might just save your life. Just be sure to get one that will still allow you to dive underwater. You can find some a large range on Amazon by clicking here.
- Inflatable surf life vests or an inflatable Water Self-help Bracelet – Again another cheap device that could get you out of a pickle. These bracelets are fairly compact and unobtrusive, but will help you in those times where you just don’t know which was it up.
- High visibility Wetsuit or at least wetsuit vest – You’d wear a high-vis vest if you were working in the middle of a highway, so why not when in the wave zone with surfers flying at you. About 1/10 of you body is sticking out of the water, you want to make sure the surfers or any marine crafts can see you in the water.
- Flippers – When you’re out their treading water and manoeuvring, flippers can help you to help faster and save energy by amplifying you movements. While some of the other equipment is a bit more take it or leave it, for surf photography in the water, I think flippers are almost essential.

Click to see on Amazon
To summarize, be aware for the safety of yourself and those around you. Wear PPE. Understand and consider the conditions. If it seems too big, heavy, or scary to swim, then it probably is, so stay on the beach. Trust your instincts, and if in doubt, don’t go out.
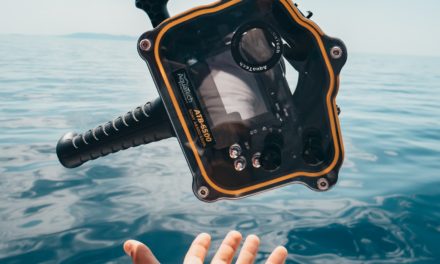
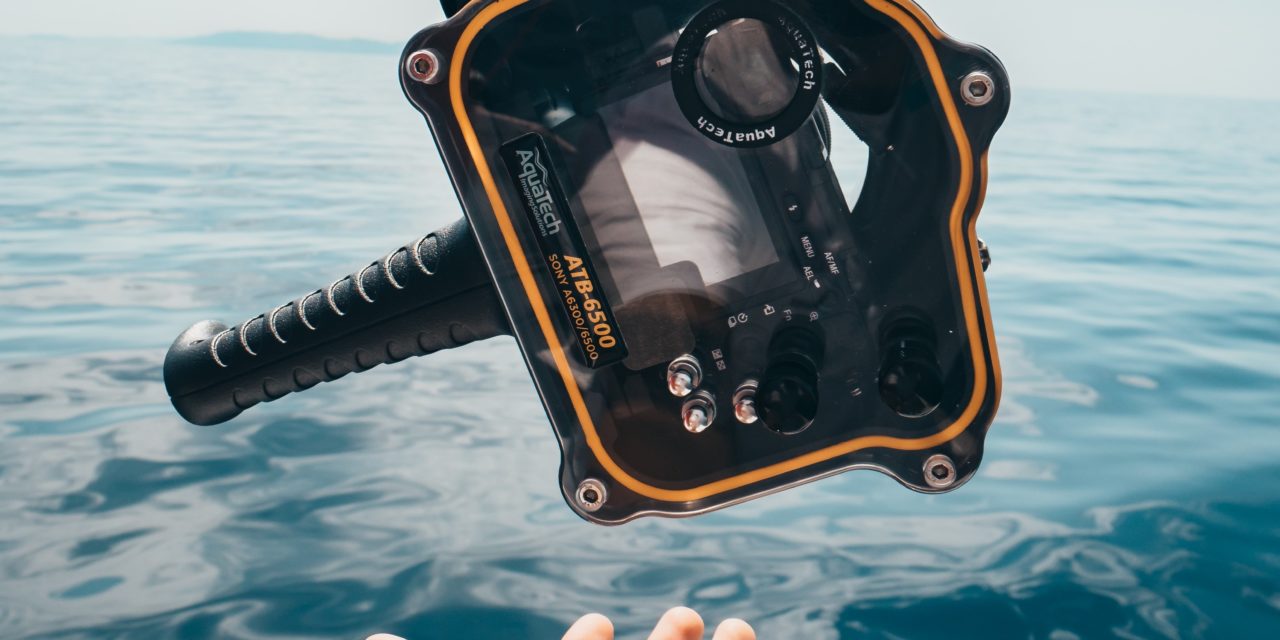
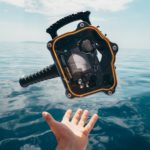
Tip #2: Getting the right water housing
This largely depends on your budget (and what you want out our your surf photography). There are 2 main options available when you’re just starting out:
A dedicated waterproof action camera:

Click to see on Amazon
While I’m sure some professional photographers will frown upon this, it doesn’t matter… I’ll say it anyway because it is a cost effective and practical way to make a start. For less than the price of a good waterproof housing you could by a dedicated waterproof camera. If you’ve already got a DSLR, you could keep it for shots from the beach. For a beginner, buying something like the latest GoPro Hero Black is a great way to start. It is compact, lightweight, shoots in 4k video to 60 fps, with a wide angle lens equivalent of a 14-28mm, and has HyperSmooth image stabilization. There’s several other action cameras you could also check out such as the Olympus Tough TG, and the Nikon Coolpix W300. In general, it would be dramatically easier to handle a compact camera in the surf. It may require more skill and patience to get professional quality shots, but it might be a worthwhile stepping stone if it gets you into the game.
Choosing Waterproof Housing for Surf Photography

Click to see on Amazon
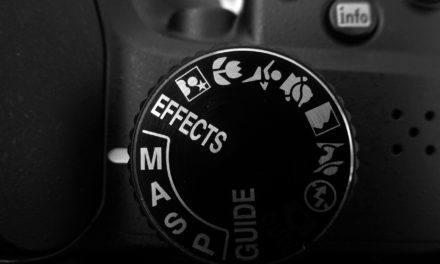
One of the first things to realize before taking a DSLR underwater, is how large and complex they are. When out in the surf, you need to be able to look after yourself, and your camera. Learn it well, because there are many different controls to operate in a short time (buttons, levers, rotating dials and more).
A lot photographers throw huge amounts of money on into the best camera and lens set up, but purchasing water housing is an afterthought. If you have an expensive camera set up, it’s probably not a good idea to buy the cheapest waterproof housing for 2 main reasons:
- It will restrict the performance quality of your camera.
- It is more prone to breaking, which may drown your camera. It starts with the buttons ceasing preventing changes to you ISO or shutter speed. And then before you know it the water housing starts leaking, destroying the electronics in the camera.
The best thing to do it balance the costs. If you’re going to invest in an amazing DSLR body and lens, look after it. Invest in a quality surf housing that has been thoroughly tested in rough wave conditions.
If you don’t have a DSLR and lens yet, consider a setup that has housing options that are widely available. For example, brands like Canon and Nikon are likely to have more options available for good quality waterproof housing.
Tip #3: Focus, composition and camera settings

The settings and focus for surf photography
Most people would say the wider the better for in water surf photography. Wide angle lenses will allow you to shoot staring down the eye of the barrel or from the lip. However, the wider the lens the closer you may need to get to your subject. For close up shooting in the water, you’re likely going to need a wide angle lenses with a max width of 24mm. The wider the lens, the closer you have to get.
Once you know you can fit your subject in the frame, it’s time to set it and forget it.
If you’re using something like a gopro you could experiment with shooting in 60fps video or time-lapse mode at 5-second interval and a wide FOV.
For DSLRs, it’s often a good idea to adjust the zoom and focus on your camera to match your desired shooting distance, before putting your camera into the housing. Set the aperture between f/7 – f/12 to give yourself a wide depth of field that will keep your subject in focus. To shoot with the ideal settings, you need a bright day with enough light to keep the aperture up, and still have a fast shutter speed to freeze the action. To truly freeze the action, I’d suggest using shutter speeds above 1/1000th. And where possible, try to keep your ISO under 400 to minimize any noise.
As a beginner, trying to figure out settings, while staying afloat as a perfect wave comes curling towards you, is a difficult task. When pushed for time or at least while you’re getting a feel for being out there, try simply your settings so you’re not constantly adjusting them. This is a good way to keep things fun until you feel comfortable trying out new wars of shooting from the water.
Consider the conditions
We’ve established you need lots of light. Yes. But you should also consider other environmental impacts to your photos, like:
- Will a cloudy sky make your photos look dull?
- Which angle is the sun coming from? Will it cast harsh shadows on you subjects?
- Will the position of the sun overexpose or underexpose my photos?
- Are the conditions safe to swim in?
- How much wind or chop is there? It’s harder for a photographer to make surf photography look good when the water is choppy and blown out.
- Is there decent swell? Good waves usually attract good surfers.
Remember to stay safe, the ocean can be a powerful and dangerous place.
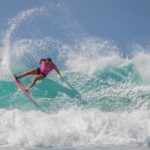
Composing your surf photography
Get your timing right. Take the time to prepare your settings in advance to give yourself more time to frame your subject. Your composition for surf photography needs to balance the focus and interest on the subject, while providing a beautiful background (waves, sky, people, boats, reef, etc). It you’re already an experienced photographer, other traditional rules and elements of composition can still apply.
Take the rule of thirds into consideration. By displacing your subject from the center of the field it draws the viewer’s attention across the photo. Instead of just looking in the middle. Too many distracting elements or large obstructions can be very distracting.
Think about the positioning of objects in the frame, do they add or detract, and how can you manipulate your perspective and use them to your advantage.
Tip #4: Post-processing tricks for surf photography
Attempting to take a near finished photo, that requires little editing, is the fastest recipe for success. However, post processing is a good way to make up for the composition you may have lost in the rush of the moment. For most photographers, post processing is still a key step to maximizing the quality of the image. Sometimes you might look at the water and say it looks so beautiful, but then when you see your photos they don’t show the true beauty of the ocean. This is where editing your surf photography in Lightroom and/or Photoshop come in handy.
Editing Surf Photography in Lightroom and Photoshop
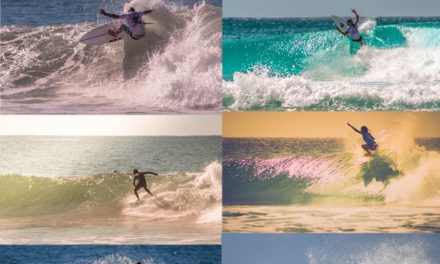
For example, say your photo has great perspective but the water color is dull and the sky is dreary. This may suck the beauty from your masterpiece. But alas, this is where editing your surf photography with Lightroom and Photoshop comes in. You can use editing and manipulation techniques to correct colors, replace backgrounds, alter shadows, enhance depth, and more. Here are some techniques to help you get started:
- Cropping – consider your subject and the rule of thirds to adjust and straighten your shots.
- Expose the surfer – play with the highlights, shadows and exposure to bring out the details of the surfer. You can use mask overlays with the Adjustment Brush tool effect isolate your subject.
- Colors – correct the color balance and enhancing the subtle blues and clarity of the ocean using the color sliders. Also try adjusting the saturation and vibrance to enhance the look further.
If you want to find out more, check out my post on editing with Lightroom and Photoshop and try out some Lightroom Presets I have made just for you.
Here are some of my tips for tips for getting started with surf photography in the water or underwater. I hope you find them helpful.. Please share your opinions in the comment section below..
