

30 Quick Tips to Learn Surf Photography
Learning surf photography & 30 steps to you need to know
Surf photography seems like it’s going to be easy right?
The surfers do the hard work of looking good on the waves, and you have to do is point and shoot?
Wrong!
There’s a lot more to surf photography than meets the eye. It just depends on how far you want to take it. If you want it to be simple you can get a good lens and camera, point it at the surfer and shoot away. But if you want to take professional photos, for customers, magazines, ads and more, then you may need to hone your skills and attention to detail.
Capturing a cool action shot is one thing, but capturing a unique and unforgettable image is another. Sometimes luck plays a part, but most of the time is takes a lot of time, patience and skill to nail that perfect shot.
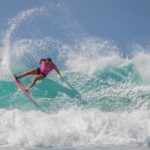
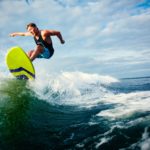
Learning surf photography is about practice and learning how to continually improve your own photos. Being a good surf photographer also means knowing how not to take photos like other people. This involves experimenting with your own perspective of the elements and scenery. What you do with your perspective is up to you, but some variables to consider are; the light, the formation of the waves, timing, motion of the surfer, and positioning of the camera. If you surf yourself, you may find understanding a surfers movements and the formation of the waves help you to predict the right moment and capture emotions.
Here are 30 Tips on how to improve your surf photography:
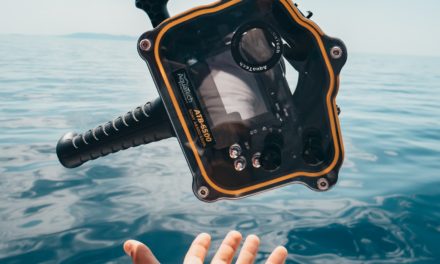
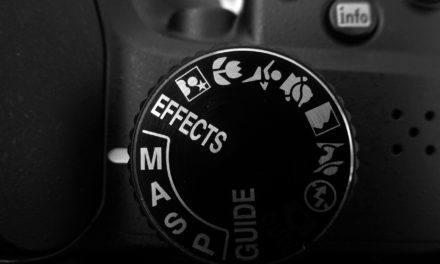
The Essentials – Equipment for Surf Photography
Knowing what you want is an important part of surf photography. It is essential to help you pick the right gear and hone your craft.
- Know your goals. Are you going to be an on land or in water surf photography? It’s ok to be both. Are you going to shoot images or video?
- Choose a high quality camera with high frames per seconds. Shooting on land and in water might require multiple cameras.
- Choose a lens. In water surf photography requires a good wide angle lens. On land surf photography requires a good telephoto lens.
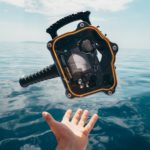
- Choose a waterproof housing (optional). If you want you’re wanting to get closer, or even out with the surfers. You may need to buy some waterproof protection for you camera, if it isn’t already waterproof.
- Buy a stable tripod. If you’re shooting from on land you want a sturdy lens to keep your camera stable. You also want to make sure the head of your tripod also has fast and smooth rotation allowing you to track your target without camera shake.
- Get several high speed memory cards. Shooting surf photography can soon fill up your space. So you want your surf shots to save fast and to have a few backup memory cards on hand at all times.
- A good camera bag (optional). Having a camera bag that carries all your gear and is weatherproof can be a great convenience. Helping you to look after your gear and get to tough places (I.e. across the rocks or in the splash zone).
Learning Surf Photography
Are you wondering how to get into surf photography? Here are the essential things to consider about surf photography when starting out:
- Understand your camera. Test all the features and find out everything there is to know about your cameras capabilities. Learn any tips and tricks you can.
- Understand exposure. Surf photography is about balancing your ISO, shutter speed and aperture to get the correct brightness. You want to be able to quickly adjust your settings to suit the light conditions.
- Study the conditions. Time of day isn’t just important for surfing. Surf photography requires you to understand the time of day, tide, weather, wind, swell and more. You need to know: Is the sun going to be in front of the waves or behind the waves? Where are the surfers going to be? How are the waves breaking? When are the optimal shooting conditions? And are they the optimal surfing conditions?
- Consider the depth of field. Analyse the distance between the nearest and farthest objects, assessing how that and any objects will affect the focus of your image. Using depth of field to your advantage to make sure your subject stands out from the background.
- Background matters. Whether it’s in focus or blurred, a background can add an additional layer of information and context to your photo. It can also help to add contrast and depth to the photo.
- Understand composition. Study the elements of composition, rule to thirds and how to balance the symmetry of your images. Arrange the elements in a scene in a pleasing and easy-to-read manner.
- Experiment with your angles. Get creative and try develop your perspective.
- Get your timing right. Take your time adjusting the settings, considering the light, composition and framing in advance to make sure you don’t miss out on the divine photo opportunities.
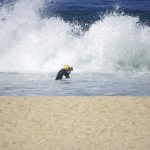
- Understand the water. Understanding when and where the magic/action is going to happen is key. Learn how waves form and break.
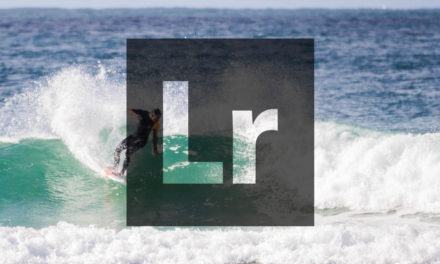
- Avoid over processing your surf photography. Editing surf photography in Lightroom and Photoshop is a great way to enhance an image, but too much editing or fake adjustments can detract from the image. When it comes to surf photography, sometimes simple is better. So don’t over do it.
Becoming a Professional Surf Photographer
Create a story with each image.
- Shoot with intention and inspiration. You should have a purpose behind each shot and a vision you’re trying to achieve. The process of taking surf photography involves many creative decisions that need to be made. From how we use the light, to how we position our subject. If you to shoot in an intentional way, you’re probably relying on luck and will often find something is missing from your images.
- Use obstacles to your advantage, by including them in your photos. Obstacles such as sand dunes, fishermen, boats, nature, etc. can help add a unique perspective to the picture included at the right angle.
- Context matters. The surroundings, obstacles, landscape and weather conditions can all play a part. A good surf photo isn’t always a shot featuring a spectacular move. Think about what else you have to work with.
- Find the right position. Selecting where to shoot from is important and can dramatically affect an image. So think about your lighting and angles. If you’re using a telephoto lens to shoot surf photography from the beach, then find a good vantage point to zoom on the surfer for a clear shot. Either avoiding, or using the obstacles to your advantage. If you’re in the water, make sure you have the right equipment to stay afloat, but maneuver quickly. In this case you may want to invest in a semi inflatable vest, a decent pair of flippers, and don’t be afraid to wear goggles to make sure can follow your subjects from underwater.
- Adjust your zoom. Make sure you can see the desired details in your photo, to avoid unnecessary cropping and loss of quality later. If you do struggle with this, it is still ok to crop. So you could also experiment with zooming out a bit to get a bit more in the frame to act as a safety margin that may prevent you from cropping out important details later one.
- Get the horizon line straight. If you don’t line up the horizon in the correct position now, you’re only creating another job for you to do later on in Lightroom. It is also good to consider where you want the horizon to be. I personally like to use the rule of thirds and align it either one third from the top or one third from the bottom. Using the rule of thirds can help to compose your photo, and draw your viewers attention to the details instead of just looking at the center.
- Check your focus point. If you want to focus on the surfer, make sure you’re not focusing on the foreground accidentally. It happens. There’s nothing worse than getting home to find all your perfectly timed action shots are blurry. So stay vigilant.
- Avoid unwanted shadows. The light can be your best friend or worst enemy. So make sure you treat ig right.
- Predict the moment. Anticipate what the swell or surfer is going to do next and get ready.
- Quality over quantity. Take the best photos you can. The water is a beautiful place, use the elements and your skill to capture moment. The best photos often require the least editing.
- Develop your portfolio. You want to build a high quality portfolio if you are to establish yourself as a reputable surf photographer.
- Be confident with your skills. If you want to sell your services, you need to be confident that you can reliably deliver quality surf photography to the customer.
- Don’t be afraid to experiment. Unless someone is paying you to do something a particular way, don’t be afraid to change things up and capture unique photos.
My final words of advice are to get out there, experiment, learn, improve and repeat. Learn to take criticism when it comes, but remember that art is subjective and it can be what you want it to be.
Now go have some fun.
If you’d like to learn more about how become a surf photographer, checkout my post ‘BEGINNERS GUIDE FOR SURF PHOTOGRAPHY’ which is an in-depth tutorial post to help you get started as a surf photographer. If you’re struggling to choose the right camera gear, find the right settings, or edit your photos, this post is where to find the answers.
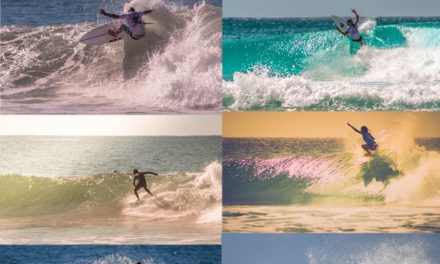
And don’t forget to download your free surf photography presets to help edit your photos in Lightroom.