
The best camera settings for surf photography – Tutorial
Camera Settings for Surf Photography
I know sometimes when you start something new, it can seem a little daunting. I’ve been in the same boat as an aspiring photographer myself. When I first started learning surf photography, one of the things I found myself studying the most, was how to choose the correct camera settings for surf and ocean photography. If I’m honest, there’s no golden answer only a guideline, because the required settings change depending months conditions you’re shooting in.
Because waves and surfers move quickly, for surf photography you typically need to shoot at a shutter speed of above 1/1000 to freeze the action. To make sure the image is correctly exposed need to then balance your aperture and ISO to let enough light in. Try to keep your ISO under 400 and you aperture between f/5 and f/11.
If you want to understand how, when and why to adjust your settings. I will break it down and explain how to understand the conditions and adjust your camera settings accordingly. So keep reading to find out what I learnt.
Understanding the conditions
The best light is often in the morning
 Shooting in darker conditions reduces your flexibility of settings and often causes lower image quality. It is best to shoot when you have the most light possible. Particularly if you are taking photos from the beach, because the more you zoom in on telephoto lenses the less light they let in. If you don’t have enough light, you will likely have to make compromises on your ISO and aperture to keep the shutter speed high.
What are you going to shoot?
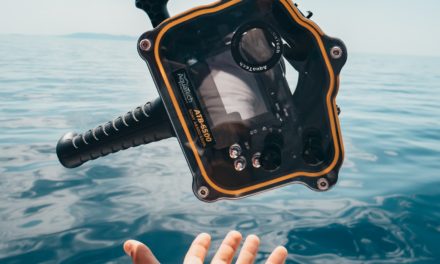
All the different scenarios involve different settings. Whether it be underwater, from land, or aerial, each is from a different distance, angle, and perspective. So the light and timing will play different roles, and your settings should be adjusted to match.
Try to take a finished image
Don’t rely on post processing and editing with Lightroom. Surf photography is all about capturing that special moment. So if makes sense that you want the photo to look as natural as possible. This starts with choosing the right settings, predicting the scene, focusing on your composure and shooting with purpose. A lot of the best looking surf photography images, don’t require heavy editing. This is also a good time saver for later, because when you come to editing your surf photography in Lightroom or Photoshop you have fewer, but better quality images to edit.
However, I should note, surf photography, like other forms of photography, is an art form. It is subjective and dependent on the vision of the photographer. If you have a vision which is slightly more abstract or creative, you don’t always have to hold back on the post editing with Lightroom, Photoshop or whatever software that gets the job done. Sometimes you might want to experiment with overlays and compositing images to create a truly unique photo. And that’s ok. As long as it’s what you’re happy doing or what your audience/customers want.
Consider your audience

You audience or customer can sometimes dictate the way you should shoot your surf photography. Of course you always want to produce the best photos possible, but do what’s reasonably practicable.
If you get asked to take photos of a surfer in exchange for money, your approach might change to if you were trying to take an extraordinary photo that may or may not make the front page of a magazine. Consider what your customer wants, because you need to make sure you deliver something that is worth their money.
For example, if I got paid $50 to come down to the beach and shoot photos of a single surfer for an hour. That’s not a lot of money, especially one you consider that you have to go home, edit the photos, clean your gear, deal with the customer. For it to be worth it to me I’d want to make sure the photos I’m taking don’t require a lot of editing, and that I can very quickly apply some basic presets or adjustments to the photos and get them ready for the customer. This means that when choosing the camera settings I would be prioritising that I can take the photos quickly, and that the customer is clearly visible and in focus. For this, I would put the camera into continuous shooting, raise the ISO a little, so I can have a shutter speed of at least 1000, then balance the aperture go get the right exposure. It will be different because you only have to track one target, so you will have more time to check and adjust the settings in between each wave. Just don’t lose site of the customer and miss a photo opportunity.
Another example, If I was shooting for the love of it or in the hopes of getting featured, knowing I might not get paid. I would work to my own creative vision. So the camera settings I choose would be tailored to the conditions.
Choosing when to go shoot
To maximise the quality of the image I would try to shoot when:
- There is lots of light. This helps to keep the ISO down and shutter speed high, which helps to reduce noise and motion blur.
- There are no clouds in the sky (subjective). Unless they are colourful or could add a lot of depth to the photos, I usually avoid clouds because they; reduce the light, dull an image, blend into the wash of the wash, and are hard not to overexpose.
- The sun is in front of the waves. You want the sun to be behind the camera, lighting your target. If the sun is behind your target it will always look overexposed and also cast harsh shadows on your subject.
- The minimal wind or chop. It’s harder for a photographer to make surf photography look good when the water is choppy and blown out. That said, I’ve seen some people use the harshness of the weather as the key focus of their photos and turn it into an advantage. However, that’s almost a different field of photography.
- There is large swell. Big waves often tend to attract more skilled surfers, and they often give you more opportunities to take awesome looking surf photography. Just remember to stay safe, the ocean can be a powerful and dangerous place.
Selecting the settings
Shoot in manual mode
Where possible, I strongly recommend shooting in manual mode. This gives you full creative control over the images.
Taking the time to manually adjust and set your surf photography settings will allow you to guarantee that your subject is properly exposed. If you’re shooting in manual mode, it requires you to be more vigilant at checking the quality of your images and composition, because camera settings won’t change between shots unless you change them.
If you’re just starting out, try practicing using the program mode (P) or shutter speed priority (‘S’ or ‘Tv’) to take more control over the photo. They are also sometimes handy where light conditions are changing too often to keep up with the action.
Program mode is like auto, but gives you access to exposure compensation. By adjusting a dial up or down, this allows you to tell the camera to make photos brighter or darker than the usual automatic settings. So if you’re struggling with light you could increase the exposure compensation to make the photos brighter.
Shutter speed priority allows you to set your shutter speed, and ISO, but the camera automatically sets the aperture. This also gives you access to exposure compensation, for your control over the brightness.
The next step is to switch to manual and experiment with aperture and your control over depth of field. If you can be comfortable with all modes of shooting, it will help you to choose the best mode for each occasion.
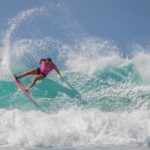
Keep the shutter speed high
Surfing is fast paced, high action sport. The most featured surf photography often show complete clarity in stopping the action. Capturing these dynamic movements requires a high shutter speed to make for a sharp picture. To avoid any motion blur, it is usually better to err on the side of caution and keep the shutter speed higher than normal. As a general rule, you should try to keep your shutter speed above 1/800. The better the lighting, the easier it is to use higher shutter speeds. However, there are exceptions to every rule in photography. So if you have artistic reasons for using a lower shutter speed, then that is perfectly fine.
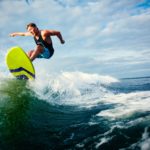
Taking sharp and in focus surf photography
Choosing your aperture
In addition to shutter speed. If you want to keep the action sharp and in focus also need to think about your aperture. The aperture controls the depth of field and how much light the lens let’s into the camera. The larger the number, the greater the depth of field, and the greater the field of focus, but the less light the lens let’s into the camera. The smaller the number, the shallower the depth of field, and the smaller the field of focus, but the more light the lens lets through to the camera. This is why it’s good to shoot with as much natural sunlight as possible. If not enough light gets through the lens, you will have to lower the shutter speed and/or raise the ISO to compensate. Which could introduce motion blur or noise and reduce your photo quality.
My research and experience suggests you should be shooting your surf photography at the aperture of at least f/4 to be able to reach those faster shutter speeds. If the light conditions allow it, for optimal sharpness and to keep everything in focus it is good to aim to use an aperture of f/7 – f/11.
How to focus your lens
For on land surf photographers, when using a zoom lens, the more you zoom in, the less light your lens will let in. Depending on the quality of your lens, you may find it easier to zoom out a little and crop the image in post editing. This can sometimes be beneficial as most zoom lenses perform best around the middle of the zoom range.
If you’re having trouble tracking and focusing on your subject… Use the continuous focusing feature (AI Servo or Continuous AF). This will allow the autofocus to track moving subjects.
To use it, point your centre focusing point on the subject then press the shutter button halfway down. Now when you follow the surfer or wave through your viewfinder, the camera will automatically adjust the focus as they move.
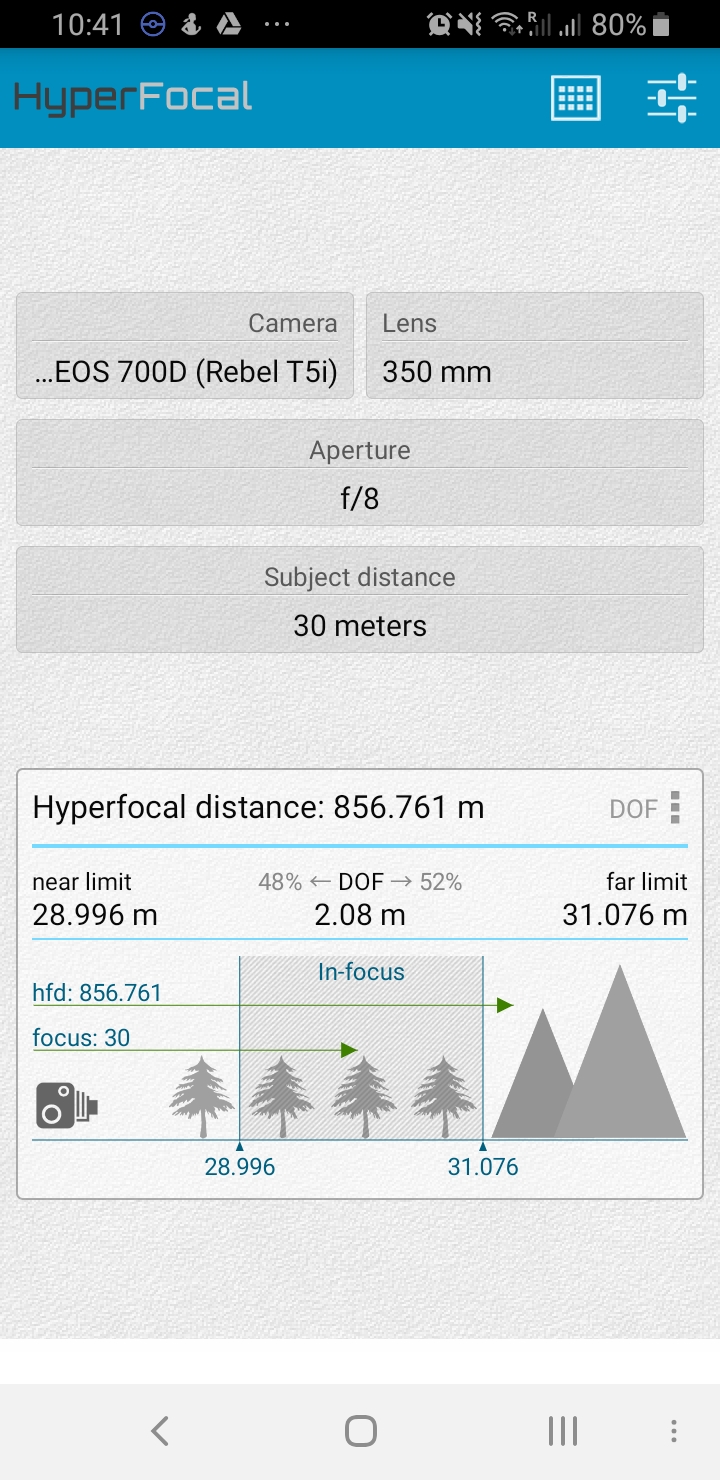
You can also choose to focus manually on the subject. To get as much in focus as possible, you may want to consider focusing using the hyperfocal distance. Hyperfocal distance can be a complicated topic to wrap you head around and I don’t proclaim to be an expert. However, in essence, using the correct hyperfocal distance helps you take the sharpest images possible. In practice this is most useful when shooting subjects from far away and the subject matter extends far into the distance, such as in some land surf photography. This calculation depends on your sensor-size and lens aperture, which involves complication maths I’m not going to get into. If you would like to try it, I recommend downloading an app like hyperfocal.
If there are too many objects distracting from hour target, try to focus at infinity. To do this, line the focus ring up with the infinity symbol. When your lens is focused to infinity, then everything in your frame will be in focus. This may be acceptably sharp, but isn’t always the most optimal shooting method for the best quality images.
To create movement in the image, sometimes it is better when parts of the image are blurred. The contrast between sharp and blurred can convey movement and emotion in the image.
Using ISO
ISO is the light sensitivity rating of your cameras digital sensor. Increasing the ISO makes the sensor more sensitive to light. This allows you photos to capture more light without needing to lower your shutter speed. Keeping the ISO low helps to minimise noise. If you want to avoid those grainy images my preference is the keep it between ISO 100-200, and try not to go higher than ISO 400 unless you really don’t have a lot of light to work with. ISO 100 is considered normal ISO, and will give you sharper shots, with the least noise and grain.
If you’re new to using manual settings you can set your ISO to auto, which should make up for a misjudgment in settings. This is also useful when the light is changing regularly however keep in mind, the lower the ISO the better.
When to increase ISO
You should only raise your ISO when you are unable to brighten the photo by adjusting shutter speed or aperture instead. When it’s darker, and you’re shooting fast moving waves and surfer you might consider increasing the ISO as it will enable you to shoot with faster shutter speeds and still expose the shot well. But as a result of this, your photos will obviously be noisier. This is another reason to consider the lighting conditions before going out for a shoot.
Are raw or jpeg images better for surf photography?
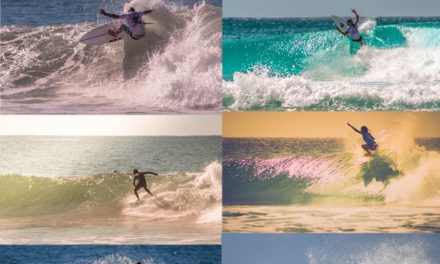
For the most control and best image quality, Shooting in RAW format is usually preferred. Raw images gives the best quality image without compressing the details. This gives you the most control over the image, allowing you to produce the best quality images and correct problems that may be unrecoverable in JPEG format. Raw images are always good to have for these reasons. However, you get your composure and settings right, sometimes it is just easier to deal with and quickly edit JPEG. I find JPEG format images respond better to Lightroom presets for my surf photography, so I like to use like set my camera to save both RAW and JPEG images. This gives you the option to still use more advanced editing on the RAW format if the image requires more advanced editing.
However, if your memory cards are ever short on space, you may want to consider shooting in just the Large JPEG format. Since RAW images are not compressed, they chew up a lot of memory. If you are shooting in RAW format, make sure you take spare memory cards.
Experiment with the camera settings
I hope this helps you in your quest to improve your ocean and surf photography. Don’t forget that there is no golden rule when it comes to choosing settings. The most important thing is to experiment with different settings and styles of photos to you create a masterpiece.
Let me know in the comments section below if this has been helpful to you and if you have anymore questions about surf photography.
If you’re wondering where to go next, check out my posts on post editing your surf photos in Lightroom and Photoshop to take the next steps.
